Saturday, June 4, 2011

sunshiny day!

i found this print and HAD to have it for my laundry room!
this frame just happened to fit the print perfectly!
i knew i wanted to paint the frame yellow, but after seeing this side table painted and glazed by the talented Alysha!
i had to have some glaze!

+
=

i LOVE how it turned out!

Wednesday, June 1, 2011

picture frame

i picked up this frame for free at a garage sale!
i have BIG plans for it... hopefully it works. i have a print that i bought off of etsy (it fits perfect!) now i just have to paint, glaze and add glass.

here's hope'n it works!

Wednesday, May 11, 2011

t-shirt keepsake quilts

i'm working on some custom t-shirt quilts at the moment!
a baby boy
teen boy &
little girl
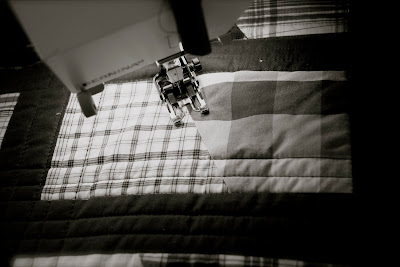
here's just a peek at one of the blocks that will be in the baby boy quilt!
i don't want to wreck the surprise for the ladies that i am making these for so i probably won't post any more pictures until they are done...

i REALLY like creating these keepsake quilt's. i find that you have to be REALLY creative when your adding fabrics to the clothes and cutting the clothes in a way that will show the BEST! i just hope it all comes together how i have envisioned... sometimes i can be my biggest critic.

Thursday, April 28, 2011

TUTORIAL: Decorative Sham

my friend needed some help decorating her daughters room before her twins arrive, so i dusted off my sewing machine ; ) i've had my eye on this sham from pottery barn kids for a while now. this was my chance to make my own version. my kids have already put in their orders for one. so i decided, why not make it into a tutorial!

there are 3 different ways you can choose to finish the back.

1. use a zipper (thats what i did on my back)
2. do a envelope opening on the back
3. leave a space at the bottom of the pillow that is left unstitched. stuff and stitch up the hole.

depending on which one you choose, the instructions will vary slightly
*1. cut 2 pieces of fabric 13"x17".
1 for the front
1 for the back (you can see from the pic that i've already sewn in the zipper)


*2. print desired letter off on the computer. place on window so that the letter is backwards.
*3. trace the letter using heat n bond lite paper. (or your favourite iron on adhesive)
*4. ruffly cut out letter and iron onto desired fabric.
*5. trim around letter
*6. remove paper backing.
*7. place letter in desired location. iron into place.
*8. add a decorative stitch around the outer edge.
*9. using the same technique as you did for the letter (steps 4-8). add any decorative pieces to the sham. i decided to cut out designs from the fabric that i was using for this sham.
*10. lay the top of the sham and the bottom of the sham facing each other. to round the corners use a round edge (i used a bowl) and trace around each corner with a pencil. trim around the corners with scissors. (make sure both layers stay in place while you cut)

*11. cut ric rac to size.
*12. place the ric rac inside the 2 layers. make sure the ric rac is slightly in from the edge and evenly placed. PIN all three layers together. allow a little excess ric rac in the corners so that they don't pull when turned rightside out. i pleated mine slightly.
*13. stitch around the sham. turn inside right and stuff!

any way you do it, it'll look FABULOUS!
it was a fun project to make! if you have any questions please don't hesitate to ask.

Wednesday, April 27, 2011

my little helper*

i hope you had a FABULOUS easter!
i know we did!
there's nothing like a weekend get away...
i always feel refreshed and ready to go
when we return.
this little man is growing like a weed!
literally...
i can't keep up with his clothes size : )
he's been helping me with my next project!
i'm currently working on 3 custom keepsake
t-shirt quilts.
* one for a girl
* one for a pre-teen boy
and
* one for a baby boy!
it was a little difficult cutting up those
baby boy clothes.
they were so TINY and CUTE!
i've made a similar quilt for my niece,
the only difference is that these
are all made with t-shirts.
they are all going to have a
different pattern and fabrics!
i'm excited to see them come together!

now if i can just shake this
head cold...

Thursday, April 7, 2011

*closet organizer DIY

what do you do when it's spring break and you have no plans...

you tackle a DIY project of course ; )

my 2 older boys share a room. it's a decent size but it always seemed like there wasn't anywhere to put anything. they have a large closet but there was only 1 shelf. it was time to add some shelving so that HOPEFULLY their room will be less of a disaster zone!

BEFORE
(toothless annie!)

AFTER
we've never built anything like this before but found the actual building of the unit the easiest part. it was the figuring out the measurements and PAINTING the shelves that took the most time.

we used:

16" pre-cut MDF shelving
1x2" primed pine for the supports
wood glue
finishing nails (brad nailer)
dap
paint

when i do this again, i'll definitely try to at least prime the shelves before they go in. painting them after is a BIG pain!
doesn't it look FABULOUS! (hopefully it stays this way)
if you need help and would like to try this yourself go over to Ana White's blog and it'll give you plans to get you on your way. we didn't end up using the plans but it was definitely my inspiration! it also helps to have a handy brother to call when your standing in the wood isle in home depot not knowing what to buy! (thanks corey)

Wednesday, March 9, 2011

"dad's shirts" a keepsake quilt

my husband likes himself a good plaid shirt. so over the years i have collected the ones that no longer are worn with this project in mind.
one of the shirts he wore when we were dating. the red plaid one he wore when we had our first 3 babies. they all remind me of different events in our life.i guess in a way it's a bit of a time line.
i also decided to add a shirt of his fathers and of his grandfathers. and because his grandfather has passed it was only fitting to leave his piece whole. you can see his shirt piece second in and one up from the bottom.
i really like the straight line quilting although it was a process to get finished. with minky on the back it's sure to get some good use and hopefully be a treasure for years to come!

Tuesday, March 1, 2011

office reno on a budget

a room opened up at my husbands office but before he could work in there we needed to give it some TLC. we added bead board, ripped out the baseboard heater, added baseboard and trim and of course a lot of paint.

here's the BEFORE
and the AFTER
what an improvement!! it needs some pictures and things to jazz it up a bit but i think we did pretty good.
i think this little man approves!

Monday, February 28, 2011

she's done!

or should i say he. i think if this console table was a sex, it would defiantly be

and here's the AFTER.
after 4 coats of red, some sanding, some staining and varnishing it's finally finished. i really love the legs and the red...
i'm not quite sure how i feel about the doors being stained... i thought it would give the piece a retro vibe but now i'm seeing a country one...
what do you think? i'm hoping in my husbands office it has more of a contemporary feel to it. fingers crossed because i REALLY don't want to paint the doors.

p.s. still working on the quilt... did you get what you wanted to get done this weekend ladies?

Friday, February 25, 2011

quilting...

there's something about sending a quilt off to the quilters that makes me nervous...

i think it's because i'm sending off my creation to be interpreted by someone else. what if they don't see the same vision???
that's what happened the last time i got a quilt back from the quilters... it's just not the way i envisioned it. the pieced blocks bulge slightly and the stitching is off. there are two horizontal lines across the bottom of the blocks and none on the top. i hate to spend the money to have it professionally quilted, just to have to fix it. i think that's why it's taken me so long to get around to finishing this one.

my goal for the weekend is to finish the console table (if it wasn't -21 out i think i would have checked that one off the list already. i'm just having a hard time bringing myself to the garage to sand off the legs...) and finish up this quilt.

if i can check these off the list, i think i'll be feeling pretty good! WHAT'S on your TO DO list for the weekend?

Monday, February 14, 2011

" i'm painting the roses red"

well not exactly roses... this.
and it's coming along nicely.
i just can't seem to get that song out of my head while i paint.

HAPPY VALENTINES DAY EVERY ONE!!

Sunday, February 13, 2011

she's got nice lines...

but she needs a little work.

this buffet cabinet has been kicking around my house for a while now. i originally found it at a garage sale, painted it black, never did finish it but it still ended up under my TV some how??? it never really worked well as a TV cabinet so i'm going to repurpose it.
we finished the reno at my husband office but it lacks furniture, so i thought, why not freshen this lady up and give her a NEW home! and because everything is grey lets add a punch of color. my husband's first chose was RED!
so RED it is. i'm going to paint it RED and stain the doors. i hope she turns out the way i picture her in my head... if not, i guess i'll just chalk it up as a BIG learning experience.

*** yes... i'm painting it in my front entry way. it just seemed like the best space. i hope no one knocks at the door ; )

UPDATE* i thought it would be fun to add pictures after each coat to see the progress.

buffet after the first coat.
UPDATE*
after second coat.

Thursday, February 3, 2011

sister = bliss

my sister's blogging again!

she use to be owner of an on-line quilt shop that ended up being too much to handle. if you know my sister though, she can't stay still for long. and with a PILE of fabric sitting around it's hard not to be inspired by all of the beautiful fabrics!

so what do you do when life hands you lemons... you make lemonade!

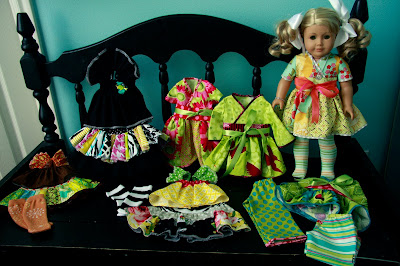
and that just what she's doing! she's making the most FABULOUS American Girl doll clothes!
i don't think they get ANY cuter than this!!
the other thing you should know about my sister is that she can sew like the wind! i have never met anyone that can sew as fast and as accurate as her. i just talked to her about making American Girl doll clothes about 4 days ago and she already has a pile of skirts made. how is that even possible???

SHE'S AMAZING!!!
now go check out her blog!

Tuesday, February 1, 2011

how i got my baby to sleep through the night.

this post is for all of those moms that have babies that don't sleep through the night until they are over a year. (at least that is when my other children decided it was time to sleep through the night.) if i only knew then, what i know now, i would have been a little smarter about things.
my baby is now 8 months. (i know everyone says this but where did the time go... they grow SO fast) he hasn't slept through the night without being fed since he was born and i/he was starting to feel it. i NEEDED/HE needed some sleep. SO... here's what we did.

he had a night where he randomly slept through the night on his own. this made me realize that he indeed COULD sleep through the night. he didn't need to eat, i was feeding him enough during the day that he really shouldn't of needed anything at night. that and he started leaking out his diapers in the night because he REALLY was getting TOO MUCH. that was a sure sign for me.

so after we knew he could sleep, we let him cry for the next 2 nights. it was hard to listen to him. there's such an urge as a mother to go pick them up and console them. i never let him get too out of control though and when he did i rocked him.

the 3rd night came and i was able to use his soother to comfort him. he really didn't cry very much at all. he woke up 3-4 times a night for his soother for about a week. and then the night came when he slept the whole night... HEAVENLY! and he's been sleeping through the night ever since.
although there is something i miss about waking up with my baby, i think we are both happier during the day. and that makes me a better mother and him a better baby.

i'm not saying that this is the BEST way or the ONLY way to get your baby to sleep through the night. this is just what worked for us. and if it helps another family get some needed sleep, then this post was worth it!